

Times
The Times section provides the employee with an overview of his working times, schedules and absences:
-
marked in green marked are logged hours
-
marked in blue marked are planned hours
-
marked in yellow marked are absences (vacation, holydays, sickness etc.)
-
marked in red are problems (planned time without corresponding time entry)
-
marked in gray are days for which neither time logging nor planning are saved
The time range for which times and plannings are shown can be selected via the three tabs at the top: Week, Month or Custom. In the Week and Month tabs, you use the arrows to jump to the previous or next time range. With Custom, the start and end dates open directly below the selection, without a separate dialog – there is no back/forward navigation here. If you select the current month, the view automatically scrolls to today. The app also remembers your last selected view after a restart.
Below the entries you always find a summary with the total of planned hours, recorded hours (total hours), contracted hours and the difference. For a single week it is usually visible right away. For larger time ranges (more than 7 days), you can use the "↓ Summary" button at the top to jump straight to the hours overview at the end of the list.
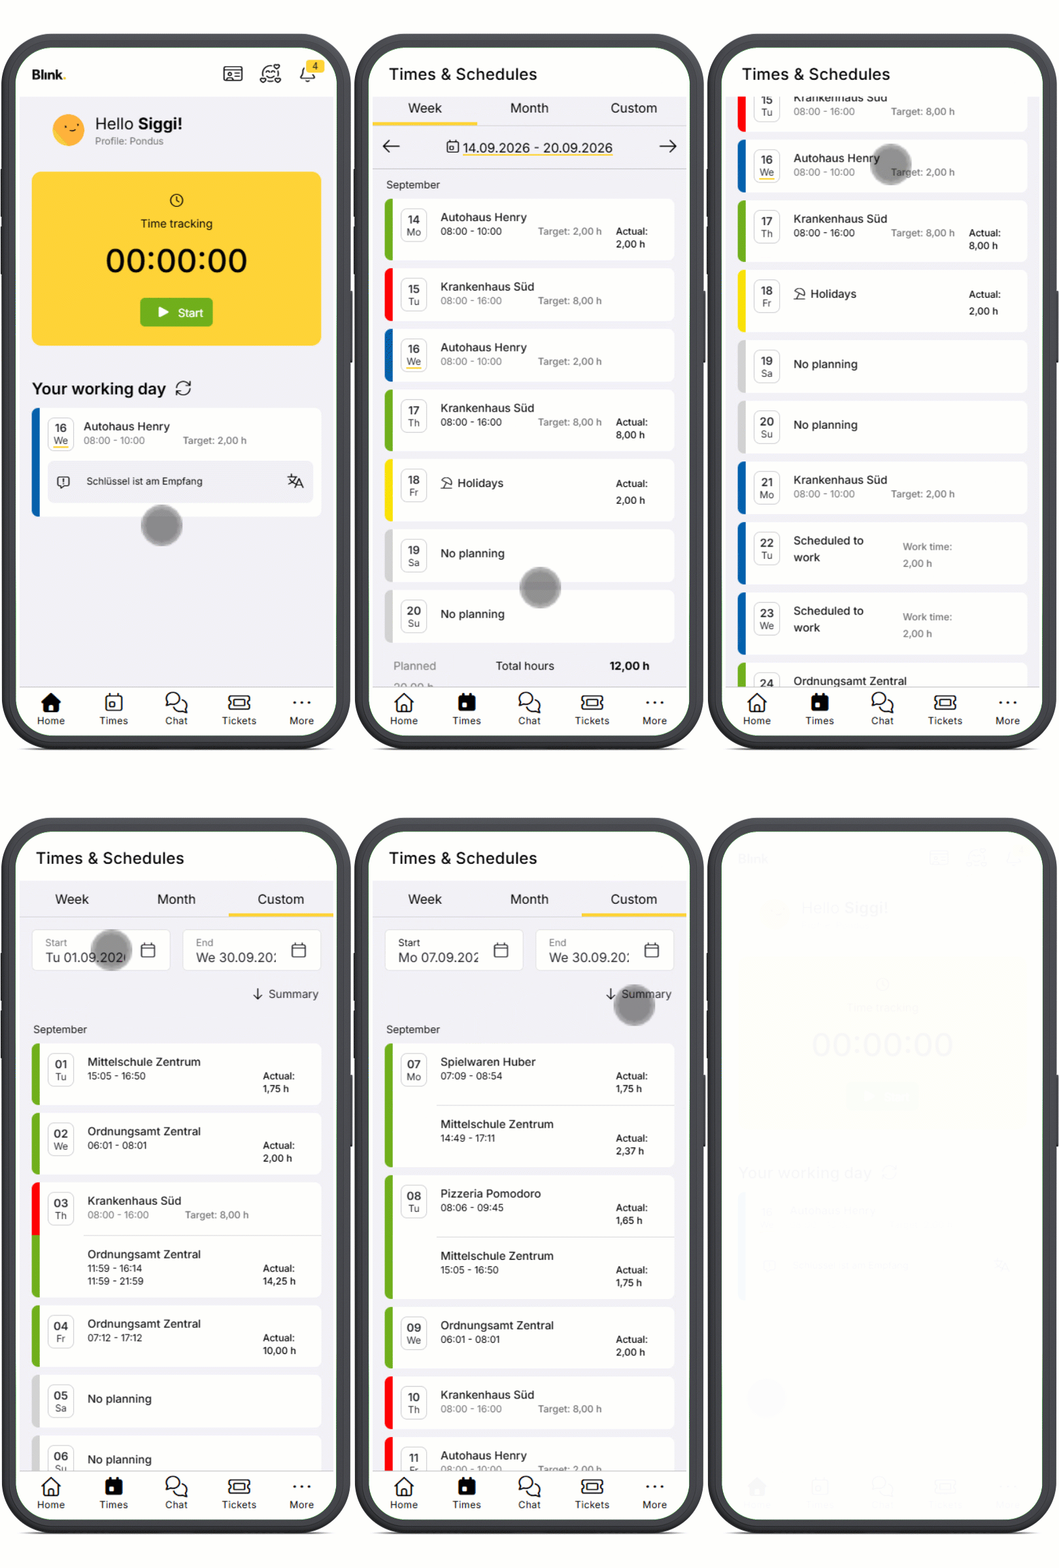
The following is displayed in the individual entries:
-
the location
-
The logged or planned time
-
Target hours and actual hours
-
A paper clip indicating that the entry contains an attachment
-
A speech bubble indicating that the entry contains a comment
-
Absences are differentiated by name and icon
With a click on the entry
-
comments and attachments can be added for logged times and absences
-
details of the location can be displayed with a route planner for scheduled times
Vacation
Pressing the “More” button in the menu on the far right takes you to “Leave” with the personal leave overview.
The available vacation days per year are displayed here, provided the vacation entitlement is stored in the employee's master data. If the vacation days are not stored in the master data, the total number of vacation days booked is displayed.
Below this there is a small calendar for each month. The screen automatically scrolls to the current month at the start. Vacations are then marked in the months with a yellow circle around the days. At the top right of each month there is a small number of vacation days per month.
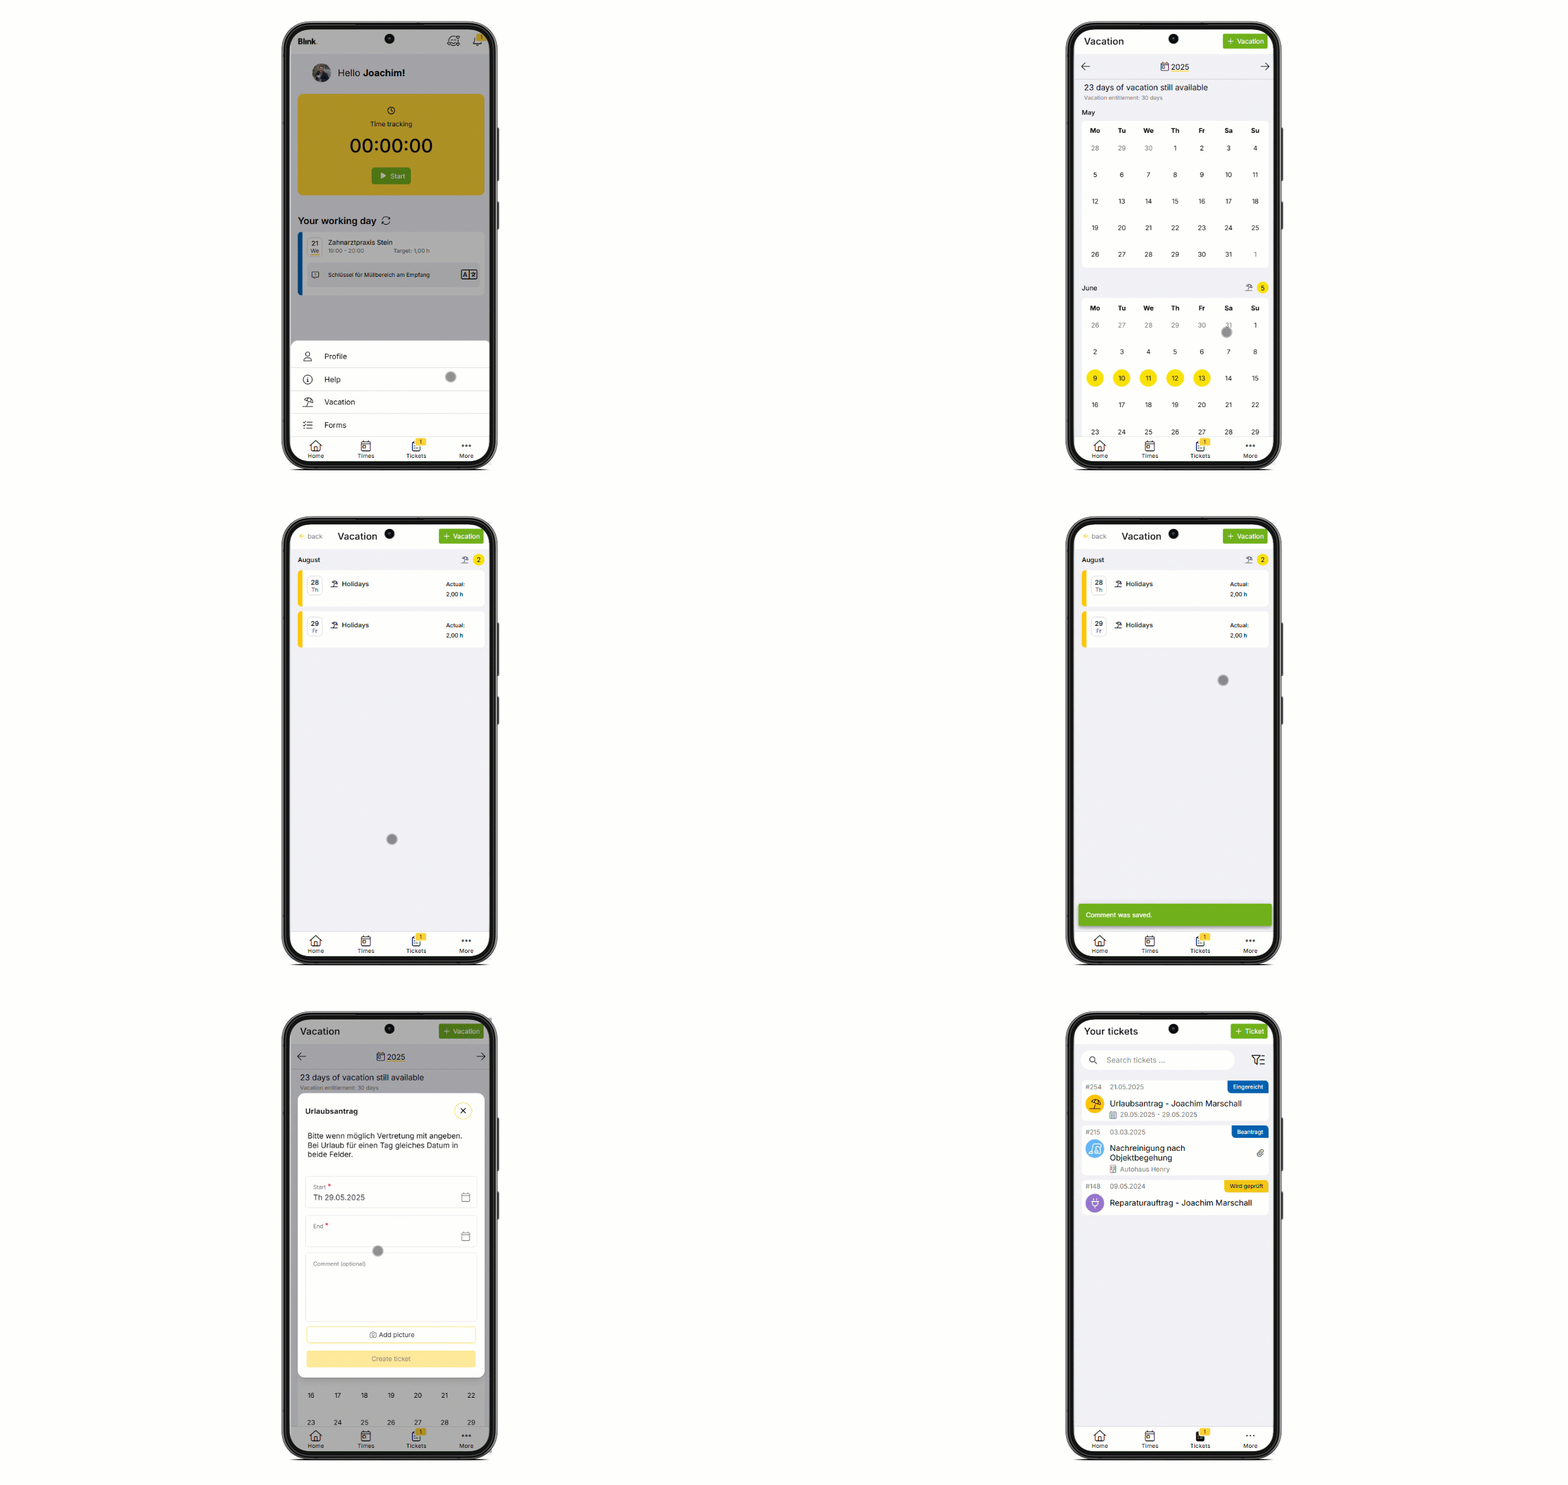
Clicking on a vacation day opens the respective month with a list view of the individual vacation days. The entries can be opened and a comment can be added, for example.
From the vacation overview, a vacation request can be created directly via ticket using the green "+ Vacation" button at the top right.